


If you suffer from back pain caused by a sedentary lifestyle and stress, the right yoga pose will help you solve this problem. Yoga is not only for your body, including getting rid of back pain, but also for your mind, that is, getting rid of the stress that causes muscle pain. These yoga poses helps busy moms getting rid of back pain.
Yoga Moves for Back Pain

There is a set of poses that will not require special training from you and will help to stretch and tighten the whole body. Practicing yoga, even for a few minutes daily, will help you understand your body and its needs, including where you accumulate stress. With just ten exercises, you can rid your spine, back pain forever. Check out these yoga poses for back pain here:
- Bitilasana (cat, cow pose)
This is not only one of the most effective and simple asanas for beginners, but also the basic posture for yoga in general. Get on all fours, bend in the lower back like a cat, and then arch your back as if showing a hump. By repeating such gentle bends, you stretch and massage the spine, trunk, arms and neck, and also massage the organs and muscles of the abdominal cavity.
During the exercise involved:
- The muscle straightening the spine (in anatomy from Latin – Musculus erector spinae)
- Rectus abdominis muscle (abs)
- Triceps
- Front dentate muscle (or superficial muscle of the chest)
- Buttocks
Execution Sequence:
- Get down on all fours.
- Keep your wrists exactly under your shoulders and your knees under your hips.
- Distribute the weight of the body so that it is the same at all the reference points of the arms and legs.
- Inhale while bending down. The look is directed up.
- Exhale, arch the spine. Pull in your stomach.
- Watch the sensations in your body when you perform this movement.
- Do not focus on your thoughts and release tension in the body.
- Continue driving for at least 1 minute.
2. Dog Face down
This pose is also one of the basic elements of yoga, it will relieve back pain and will serve as a prophylaxis of radiculitis. Helps develop balance in the body and improves endurance.
During the exercise involved:
- Tendons
- Deltoid
- Gluteal muscle
- Triceps
- Quadriceps femoris
Execution Sequence:
- Get down on all fours.
- Place your hands right under your wrists and your knees under your hips.
- Push back with your hands, lift your heels off the ground and raise your knees.
- Lift the buttocks up.
- Keep a slight bend in the knees, lengthen the spine and tailbone.
- Keep your heels torn off.
- Press your hands firmly to the floor.
- Distribute your weight evenly between both sides of the body, paying attention to the position of the hips and shoulders.
- Keep your head in line with your forearms or slightly pressed chin.
- Hold this pose for 1 minute.
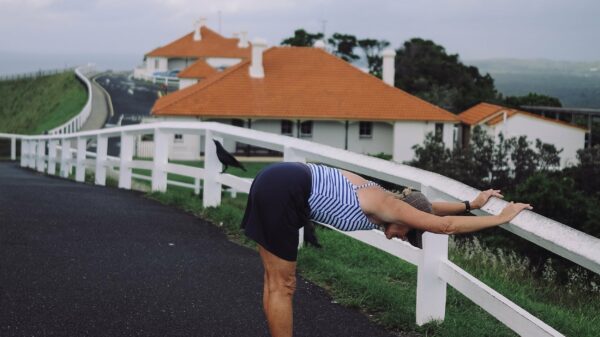
3. Elongated Triangle Pose
This yoga asana is especially good for the back and neck, as it stretches the muscles in them. It also stretches the muscles of the spine, groin, hips, while strengthening the shoulders, legs, chest. It effectively helps reduce stress and anxiety.
During the exercise involved:
- Back muscles
- Inner oblique muscle of the abdomen
- Large and middle gluteal muscles
- Tendons
- Quadriceps femoris
Execution Sequence:
- Put your legs wider than your shoulders.
- Lean on one side, put your hand to the corresponding leg. Pull the other hand up.
- Look up, forward or lower your gaze.
- Perform this asana for one minute.
- And as many on the other side.
4. Ardha Bhujangasana (or Sphinx pose)
This gentle yoga asana is ideal for pain in the back of the body – it stretches the chest, shoulders and stomach.
During the exercise involved:
- Straightening muscle
- Gluteal muscles
- Rib cage
- Trapezoid
- Back muscles
Execution Sequence:
- Lie on your stomach on the floor, straighten your legs.
- Lift the case, rest your hands on the floor. Make sure that your elbows are under your shoulders, palms pressed to the floor.
- You must rise up through the spine, and start the decline through the crown – do not fall down at once.
- Look in front of you. Don’t think about anything, focus on the movements.
- Hold for about five minutes.
5. Cobra pose
This “bridge” is almost identical to the sphinx pose and is also an integral part of home yoga classes for the back. In addition, it stretches the muscles of the abdomen, chest and shoulders. Asana also strengthens the spine and serves to prevent radiculitis.
During the exercise involved:
- Tendons
- Buttock muscle
- Deltoid muscle
- Triceps
- Front dentate muscle
Execution Sequence:
- Lie on your stomach, put your hands under your shoulders, fingers pointing forward.
- Hold hands firmly against your body. Do not let your elbows go sideways.
- Using your hand lift, slowly raise your head, chest, and shoulders.
- You can climb to any height that is comfortable for you.
- Keep a slight bend at the elbows.
- You can take your head back to stretch even more.
- As you exhale, lower yourself.
- Relax your neck.
- Slowly move your hips from side to side to relieve muscle tension.
6. Locust pose
Asana works on the lower body, helps relieve lower back pain and general depression. Strengthens the back of the torso, arms and legs. This posture promotes healthy digestion and eliminates constipation and flatulence.
During the exercise involved:
- Trapezius muscles
- Spinal muscles
- Buttocks
- Triceps
Execution Sequence:
- Lie on your stomach, stretch your legs.
- Gradually raise the body: head, chest and arms – to a level comfortable for you.
- You can bring your hands together behind your back and cross your fingers behind your back.
- Raise your legs to strengthen your posture.
- Look straight or slightly up, extending the back of the neck.
- Duration up to one minute.
- Take a break before the next approach.
7. Bridge Pose
Yes, the bridge, well familiar to you from children’s dance and gymnastics clubs, came from yoga, it is on its basis that most yoga poses are performed to improve the health of the back and neck.
During the exercise involved:
- Abdominal muscles
- Buttocks
- Spine
- Tendons
Execution Sequence:
- Press your back to the mat, bend your knees. Place your heels parallel to your hips.
- Put your hands down.
- Start pushing your tailbone up.
- Continue pushing until the hips are parallel to the floor.
- Hands can be placed under the hips for support.
- Hold the pose for one minute.
- Slowly put your back on the mat.
- Relax your whole body and take a couple of deep breaths.
8. Matsyendrasana (pose of the god of fish)
This twisting pose restores your spine, relieving back pain. She stretches her hips, shoulders and neck. This pose can help relieve fatigue and stimulate your internal organs to work better.
During the exercise involved:
- Rhomboid muscles between the shoulder blades
- Chest muscles
- Spinal muscles
- Rib cage
- Loin
Execution Sequence
- Sit with one of your legs bent under you
- Put the other on top of your thigh
- With the opposite hand, touch the knee of the leg standing on the other leg.
- Turn your head in the opposite direction
- Keep this asana for one minute.
- Repeat on the other side of the body.
9. Knee twists
Turns with raised hips help develop the activity of the muscles of the spine and back. Practicing this posture can relieve pain and stiffness.
During the exercise involved:
- Spine
- Abdominal muscles
- Trapezoid
- Rib cage
Execution Sequence:
- Lying on your back, pull your knees to your chest, arms to the sides.
- Lower your legs on either side of the body, knees together.
- It is allowed for convenience to use a pillow: put it under or between the knees.
- You can also gently press down on your knees.
- Breathe deeply.
- Asana is performed for at least 30 seconds.
- Repeat on the other side.
10. Baby pose
This pose is an ideal way to release the tension of the back of the body because the spine is lengthened and stretched. The same effect will be felt in the muscles of the hips and ankles. This is the best tool to combat stress.
During the exercise involved:
- Buttocks
- Muscle rotators
- Tendons
- Vertebrae
Execution Sequence:
- Sit on your heels, knees together.
- You can also use a lining under the head or legs.
- Bow to your forehead on the floor.
- Stretch your arms or lower them with your palms up.
- Release your back tightness.
- Hold for up to five minutes.
For more and complete understanding of the exercises, you need to get advice from a yoga instructor who understands spinal therapy in yoga.


Pingback: Reasons For Meeting An Urologist – Piczasso.com